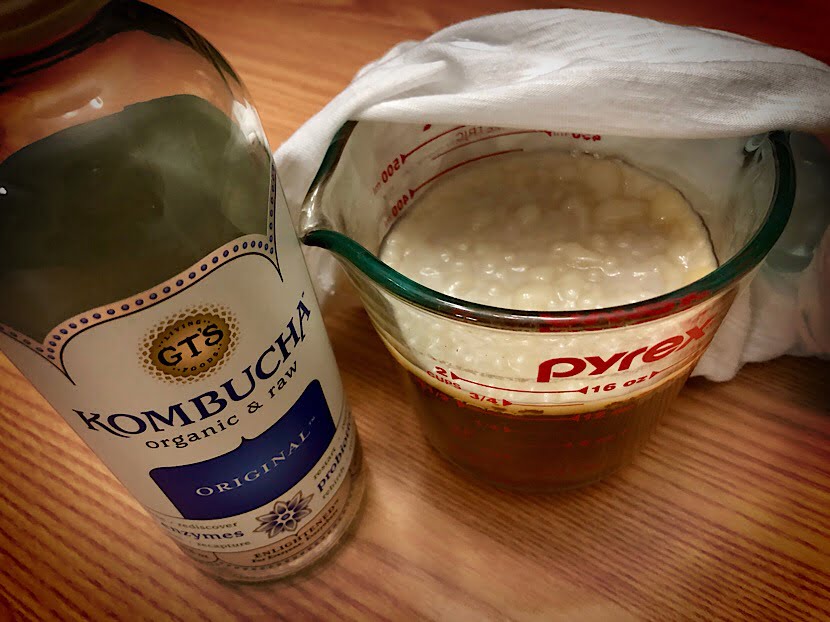
Making a scoby for kombucha is very easy! I’ve been drinking kombucha for a while now, probably over 6 years. I started making it myself for the past 2 years. If you are new to drinking kombucha or have never even heard of it, it’s basically fermented tea that contains probiotics. Eating and drinking fermented foods have many benefits. Check out this article for a little more insight on pros and cons. I encourage you to always do your own research before creating or consuming kombucha or any type of fermented food or drink.
When making kombucha at home you are able to control exactly what is in it, like how much sugar it contains. The journey all starts with the scoby though…which it why you are here. Right? Let’s make it!
Materials needed
- 1 Wide mouth glass jar
- 1 Bottle of GT’s organic and raw, Original kombucha (or any similar brand)
- 1 Rubberband
- Clean breathable cloth (a plain t-shirt works fine)
- Apple cider vinegar (for rinsing)
Instructions
This recipe is good for 1 scoby that can ferment about a 1/2 gallon of new kombucha starter.
1. Before you begin you want to make sure your jar is thoroughly washed and sanitized. Wash your jar with soap and water, making sure to rinse it well. After that rinse your jar with apple cider vinegar.
2. Now that your jar is ready to go, open the bottle of GTS kombucha and pour all of it inside the glass wide mouth jar.
3. Cover the jar with the breathable cloth and secure it with a rubber band. The “hard part” is done.
4. Find a dark area to place your scoby starter in. Place it there and leave it alone for about 3 weeks. In warmer temperatures the scoby will grow a bit faster, and slower in cooler temperatures. I like my scoby to be about 1/4 inch in thickness before I pull it out. You can allow it to sit as long as there is still liquid in the jar.
*The scoby eats the sugar in the kombucha which allows it to grow….it’s completely alive lol. You don’t want it to sit too long because it may eat all the sugar and start to die.
After your scoby is ready you can use the remaining liquid for your starter to create a batch of kombucha. You may also double the recipe and let the scoby sit longer to create a more mature one for larger kombucha brews.
How to tell if your scoby has gone bad?
If the scoby starts to go bad you will know it. In most cases you can tell by checking for mold. If your scoby has mold it would look similar to that of moldy cheese or other foods. Check out this helpful website for example photos of mold and healthy scoby’s. ***Warning if you get grossed out at the sight of looking at mold, you may want to prepare yourself.***
See I told you it was super simple! If you have any question feel free to comment below. I am currently working on a new scoby now so I’ll be posting some recipes on how I make kombucha with the double fermentation method. Lastly, for those who live in Guam I purchased GT Kombucha from Payless in the Micronesia Mall. They normally have this brand in stock.
Thanks for hanging out today!
XO Terreana

