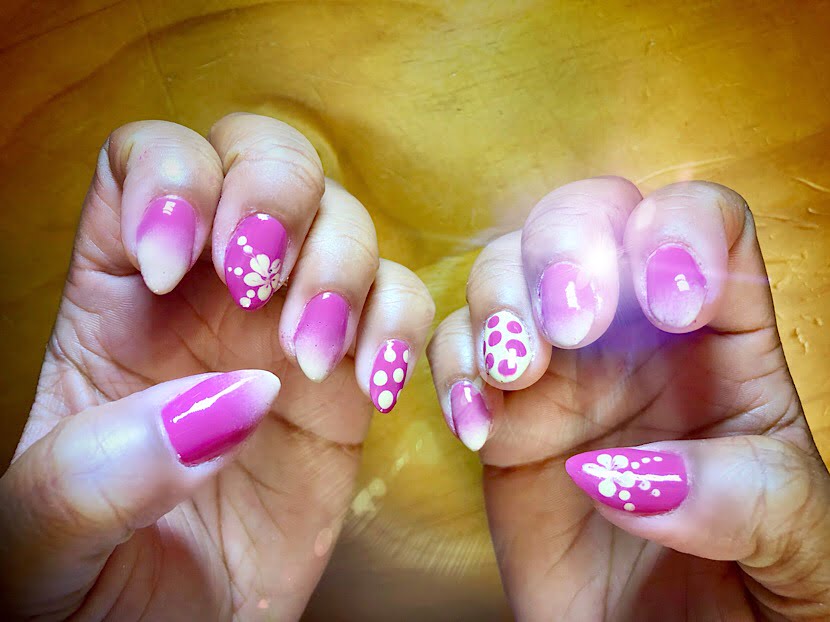
After testing Quimica Alemana, Nail Hardener my nails have really grown. (check out the post HERE if you missed it) Since my nails are at a nice length I want to start doing fun nail designs like I used to do when I had artificial nails. I don’t have hours to spend on my nails so I prefer to do quick designs and save the elaborate stuff for when I’m able to take more time.
*Affiliate links are used, which means I receive a commission if you use that link and make a purchase (at no additional cost to you). My content is never influenced by brands, products received, usage of affiliate links, or brand partnerships. XO
Favorite Nail Polishes
When I paint my nails at home I want them to dry quick and last more than a few days.
Base coat: I’m in love with using Quimica Alemana, Nail Hardener as a base coat. I use one layer and it keeps my nails strong and helps with chipping. The longer my nails grow the stronger they have become. When I first started using the polish it took some time to see results but it truly has been a miracle for my nails.
Nail lacquer: China Glaze makes amazing nail polishes. They have a wide variety of colors and they last at least a week on my nails. When I use it for pedicures I will get more than 2 weeks of wear. I don’t normally keep the same polish longer than 3 weeks. I like to switch things up! 🙂
Top coat: China Glaze, Fast Forward Top Coat and Seche Vite, Dry Fast Top Coat are my favorite top coats. They both offer an amazing shine and dry down fast.
When I combine all these polishes my nails come out great every time. I purchase these polishes at Sally’s or Walmart when I haven’t had a chance to stop by a pro store.
Simple Nail Designs
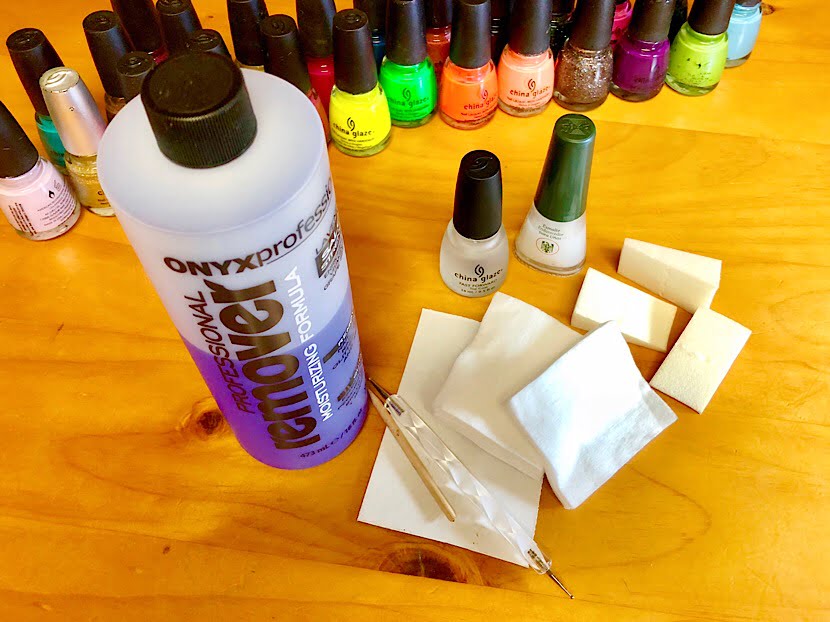
Materials Needed
Dotting Tool
Disposable Sponge
Toothpick
Cardboard Piece (this is to apply design polish on)
Base Coat
Nail Lacquer of choice (at least 2 colors)
Top Coat
Nail Polish Remover
Cotton
*Designs look best on clean shaped nails with pushed back cuticles.
Dots
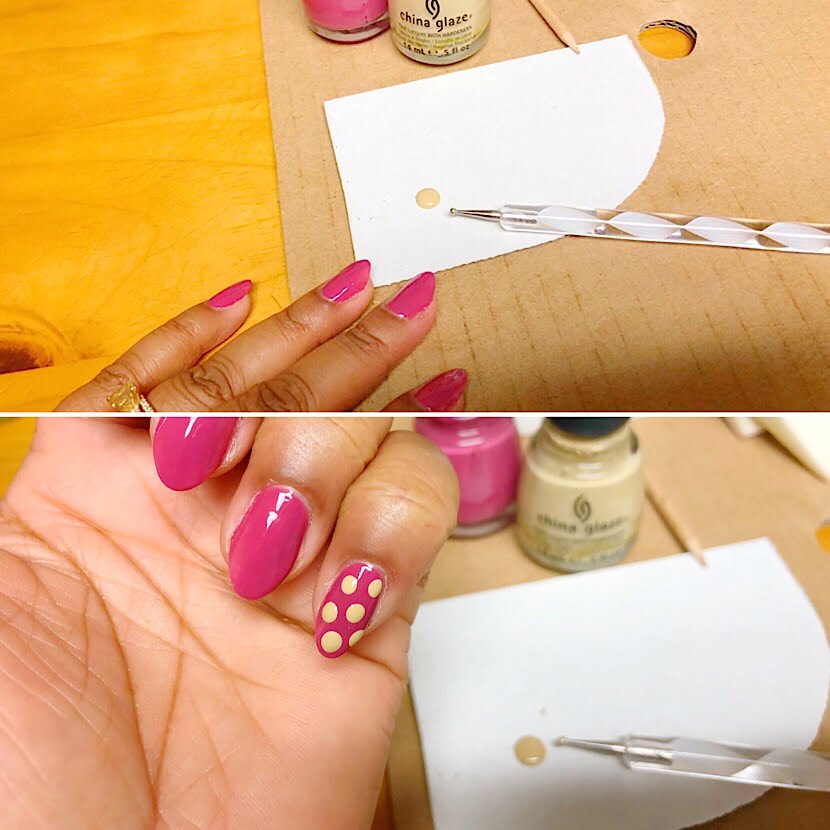
1. Apply one layer of base coat and allow it to slightly dry.
2. Next apply 2 layers of the first nail lacquer color. (I find it easier to do one hand at a time if you are first starting out with designs)
3. Take the polish you chose for the design and place a few drops on the cardboard.
4. With the dotting tool dip it in the color and place it on your nails until you reach your desired look.
5. Allow it to dry and apply top coat.
I like to do large dots spread out across the nail. It is a super quick design that looks so cute. You can achieve different effects by doing all the nails with this design or choosing a few nails to accent. Try it with multiple colors or different size dots. There are so many combinations.
Simple Flowers
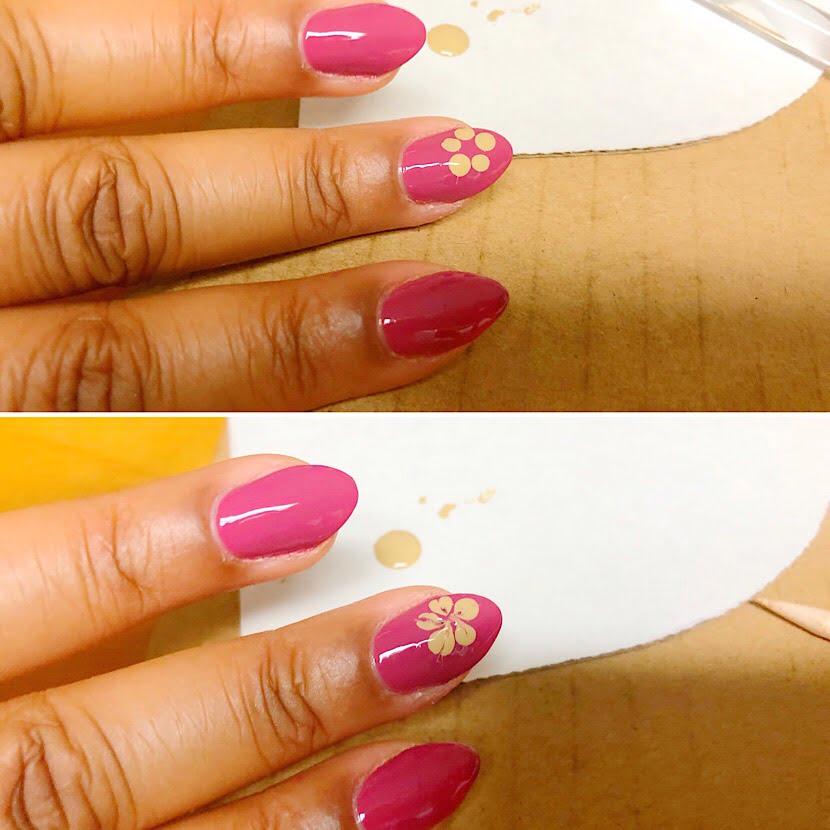
1. Start by applying one layer of base coat and allowing it to slightly dry, then apply 2 layers of the first nail lacquer color.
2. Grab your polish of choice and place a few drops on the cardboard.
3. With the dotting tool dip it in the color and place 5 dots on your nail arranged in a circle. It’s ok if they touch a bit.
4. Take the toothpick and lightly drag it along each circle to bring the color into the open space in the middle.
5. Add a different color dot in the middle or leave it as is.
6. Allow it to dry and apply top coat.
This design looks great with multiple flowers as well as just one. You can add different color dots on top of the existing dots to create a different effect.
Ombre
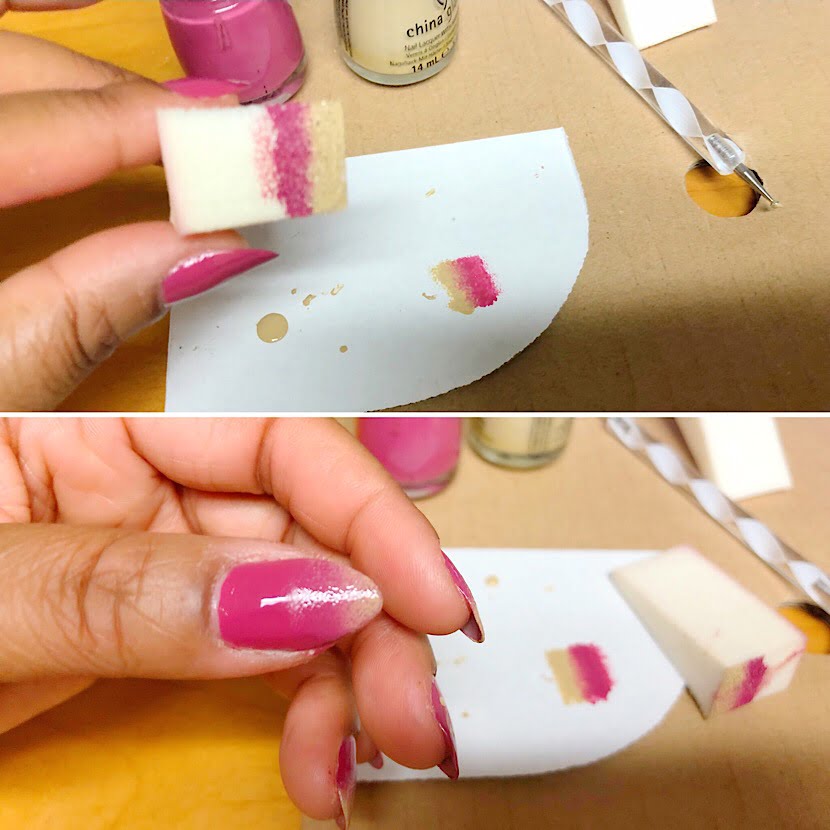
1. Begin with one layer of base coat and allow it to slightly dry.
2. Apply 1 layer of the first nail lacquer color and allow it to dry.
3. Take your sponge and apply a layer of each color side by side then press it on the cardboard to blend. Repeat this step but instead apply it directly to your nails to blend the colors.
4. Use the sponge on your nails until the desired opacity is reached. Apply more color to the sponge as needed. (It helps to blend easier if the polish consistency is thin.)
5. Use nail polish remover and cotton to clean any areas around the nail then apply top coat.
6. Try this design with multiple colors. You can’t mess it up! Have fun with it.
Let me know some of your favorite nail designs to do. If doing designs are not your thing nail stickers and stamps are a great option as well.
Thanks for hanging out today!
XO Terreana

