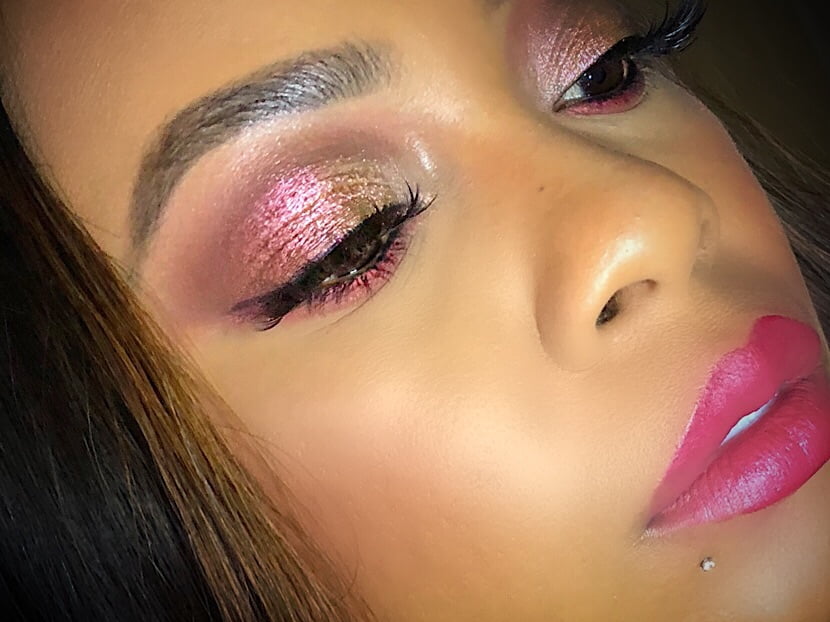
Eyebrows shape the face. The way your brows are groomed can completely change how your face looks. Maintaining your brows at home doesn’t have to be a long drawn out process. It is recommended to see a professional for your initial shape and a touch up here and there. If you don’t have that option or have a “Browmergency” then these tips will help you out. Trust me we have all been there lol!
Know your ideal shape
The first thing you should ask yourself when looking at your brows is “How do my brows grow naturally?” Getting familiar with your brows growth pattern is the best starting point. There is no better style than the one you are born with. Trends come and go. Thin, super arch, intense lined brows….the list can go on and on. When starting with your natural shape you identify what needs to be groomed and leave the rest of the brow as is. Over plucking can lead to all kinds of issues. The obvious issue is appearance. You can always tell when someone has been victimized by over tweezing (slight Mean Girls reference there lol), especially when the hairs begin to grow back. Going overboard on plucking becomes more maintenance than necessary. You can get advanced by grooming according to your face shape. To keep things simple, your natural brow shape will always work perfectly as a guide.
Shaping guide-Back to basics sis
So you are ready for shaping! You know what your brows are naturally doing on your face at this point. Check! Grab your brow pencil. Hold the pencil against the outside edge of your nose to the inside corner of your eye. This is where your brow ideally should begin. From that same point on your nose, tilt your pencil diagonally across the pupil of your eye. This is where your arch should be. Lastly, continuing from the same point on your nose move the pencil to line up with the outer corner of your eye. Your brow should end at this area. The motions in this guide are similar to a clock. If you keep that in mind it will be easier to remember. This is the traditional method for shaping your brows. At each step you can make a small mark with your brow pencil. Doing so helps to keep them even on both sides. I use the word even very loosely. Your brows will be sisters not twins. That’s what my esthetician instructor would say when I was in school. 🙂 By using this method and knowing your natural shape you have the basic information you need to create your perfect shape.

Just leave them alone
So what happens if you over pluck your brows? Short answer: Just leave them alone! It may be hard to look at them while they grow out but it will all work out lol. Again…I’ve been there! If you try to keep “fixing” them it will take so much longer for them to get to the perfect shape you want. Once they have grown out naturally…all the way out sis…seek a professional with good credentials to shape them. Or you can use the tips listed to try again.
Keeping a nice shape while growing your brows
As I previously mentioned, growing your brows out can be a pain. When growing your brows or if you just want a more groomed appearance use concealer under your brow. Concealer acts to cover up the hairs so they look less visible. Once they have grown out, concealer can also be used as a guide so you know what hairs to remove for refining your natural brow shape. I really love this trick because it simplifies things to make it less likely for you to over tweeze. Outline the top and bottom of your brows with concealer. Take a look at the shape and correct any areas that need it. When you have your desired shape just pluck the hairs in the outlined area. Using a lighter concealer works best with this technique. When covering the hair it is best to use one that is your skin tone or close to it.
Brow stencils for the win
Brow stencils are very simple to use. First take your brow stencil of choice. They come in a variety of shapes. Place the stencil against your brow and fill it in with your product of choice. Brow powder and an angle brush work perfect with this method. (Note: Placing the stencil firmly will produce cleaner results) After applying the product, remove the stencil and clean up around the brow with a makeup wipe. Use a spoolie to brush through the hairs for a more natural look.
Brow powder and markers
Brow powder is a way to fill in areas of the brow that are sparse. A simple way to use it is by taking an angle brush, load the product on the brush and make light stamping motions in the brows. This trick works best if you already have your preferred style but want the appearance of fuller brows. Markers work in a similar way. When you want fullness take the brow marker and lightly stamp hair like strokes into the brows.
Shape your brows with a brow pen or pencil
Take the brow pencil and determine your style using the shape guide above. Then grab your pen and lightly outline your brow. Taking your pen lightly, draw small hair-like strokes within the brow until you get your desired look. When using this tool blend the product into your brows by combing it through with a spoolie brush. This helps to make the brows look a lot more natural. If you naturally have full brows less is more with this. You can proceed by adding concealer to clean them up if you are applying other makeup. This can also be used to maintain your shape. Simply tweeze around the brow.
Defining with brow pomade
After determining your shape take a thin angle brush and apply a small amount of pomade inside the cap of the jar or on the back of your hand. This will ensure you are not using too much product. Load a little product onto the brush and lightly outline your brow shape. Brush thin hair-like strokes onto the brow. While doing this step when getting closer to the nose apply much less pressure on the brush. This will give a more natural look as pomades tend to be a bit more bold in pigment.
Setting your brows
Keeping your brows looking great all day is easy. Brow gels are my favorite way to keep the hairs looking exactly how I want them without moving. There are many on the market. Some are tinted while others are clear. Tinted brow gel is another way to add the appearance of a fuller brow.
Another way to keep your brows in place all day is to apply a little bit of eyeshadow primer first before applying products. Primers that dry clear are best for this.
Tweezer vs facial razor and using what is best for you
When grooming the brows it is key to consider the tools you use. The two most common tools are tweezers and facial razors. Both give good results but the way your hair grows back is very different. Tweezers pull the hair from the root. When pulling the hair from the root it takes much longer to grow back. As the hair begins to grow back the diameter of the hair doesn’t appear as thick because the tip of the hair is intact. One drawback with using this method is initially the area that is tweezed can be sensitive and cause a bit of pain. With regular grooming most people tend to get used to the irritation it causes.
Using a facial razor is a quick way to groom the brows. Razors don’t cause much irritation and you can see the intended shape much faster than with tweezers. On the downside the brow hair grows back much faster. As the hair grows back it will have an appearance of thicker hair because razors cut the hair bluntly.
Tweezing is personally my preferred method. If you are new to grooming using a facial razor is an option to try. If a mistake is made you don’t have to wait as long for the hair to grow back.
I hope you found this information helpful. Having amazing brows can be simple.
Thanks for hanging out today!
XO Terreana


3 thoughts on “How to Shape Eyebrows at Home-Best Tips for Amazing Definition”
Thank you for the diagram. I’ve purchased some brow tools. im going to try this and see if I can improve my brows. They have always bugged me,
I’m glad you found it helpful!